-->

Welcome to our Coding with python Page!!! hier you find various code with PHP, Python, AI, Cyber, etc ... Electricity, Energy, Nuclear Power

Wednesday, 18 July 2018

Tutorial Web Development with Python using MySQL and PostgreSQL

Summary

Starting


subscribe to our channel


So you know Python and want to make a website. web.py provides the code to make that easy.
If you want to do the whole tutorial, you’ll need to have installed Python, web.py, flup, psycopg2, and Postgres (or equivalent database and Python driver). (See install for details.)
Let’s get started.

URL Handling

The most important part of any website is its URL structure. Your URLs aren’t just the thing that your visitors see and email to their friends, they also provide a mental model of how your website works. On popular sites like del.icio.us, the URLs are even part of the user interface. web.py makes it easy to make great URLs.
To get started with your web.py application, open up a new text file (let’s call it code.py) and type:
import web
This imports the web.py module.
Now we need to tell web.py our URL structure. Let’s start out with something simple:
urls = (
  '/', 'index'
)
The first part is a regular expressions that matches a URL, like /, /help/faq, /item/(\d+), etc. (i.e. \d+ would match a sequence of digits). The parentheses say to capture that piece of the matched data for use later on. The second part is the name of a class to send the request to, like index, view, welcomes.hello (which gets the hello class of the welcomes module), or get_\1. \1 is replaced by the first capture of your regular expression; any remaining captures get passed to your function.
This line says we want the URL / (i.e. the front page) to be handled by the class named index.

GET and POST: the difference

Now we need to write the index class. While most people don’t notice it just browsing around, your browser uses a language known as HTTP for communicating with the World Wide Web. The details aren’t important, but the basic idea is that Web visitors ask web servers to perform certain functions (like GET or POST) on URLs (like / or /foo?f=1).
GET is the one we’re all familiar with, the one used to request the text of a web page. When you type harvard.edu into your web browser, it literally asks the Harvard web server to GET /. The second-most famous, POST, is often used when submitting certain kinds of forms, like a request to purchase something. You use POST whenever the act of submitting a request does something (like charge your credit card and process an order). This is key, because GET URLs can be passed around and indexed by search engines, which you definitely want for most of your pages but definitely don’t want for things like processing orders (imagine if Google tried to buy everything on your site!).
In our web.py code, we make the distinction between the two clear:
class index:
    def GET(self):
        return "Hello, world!"
This GET function will now get called by web.py anytime someone makes a GET request for /.
Now we need to create an application specifying the urls and a way to tell web.py to start serving web pages:
if __name__ == "__main__": 
    app = web.application(urls, globals())
    app.run()        
First we tell web.py to create an application with the URLs we listed above, looking up the classes in the global namespace of this file. And finally we make sure that web.py serves the application we created above.
Now notice that although I’ve been talking a lot here, we only really have five or so lines of code. That’s all you need to make a complete web.py application.
For easier access, here’s how your code should look like:
import web

urls = (
    '/', 'index'
)

class index:
    def GET(self):
        return "Hello, world!"

if __name__ == "__main__":
    app = web.application(urls, globals())
    app.run()

Start the server


subscribe to our channel


If you go to your command line and type:
$ python code.py
http://0.0.0.0:8080/
You now have your web.py application running a real web server on your computer. Visit that URL and you should see “Hello, world!” (You can add an IP address/port after the “code.py” bit to control where web.py launches the server. You can also tell it to run a fastcgi or scgi server.)
Note: You can specify the port number to use on the command line like this if you can’t or don’t want to use the default:
$ python code.py 1234

Templating

Writing HTML from inside Python can get cumbersome; it’s much more fun to write Python from inside HTML. Luckily, web.py makes that pretty easy.
Let’s make a new directory for our templates (we’ll call it templates). Inside, make a new file whose name ends with HTML (we’ll call it index.html). Now, inside, you can just write normal HTML:
<em>Hello</em>, world!
Or you can use web.py’s templating language to add code to your HTML:
$def with (name)

$if name:
    I just wanted to say <em>hello</em> to $name. with the help 
    of <a href="https://thepythoncoding.blogspot.com/">The Python Coding</a>
$else:
    <em>Hello</em>, world!
As you can see, the templates look a lot like Python files except for the def with statement at the top (saying what the template gets called with) and the $s placed in front of any code. Currently, template.py requires the $def statement to be the first line of the file. Also, note that web.py automatically escapes any variables used here, so that if for some reason name is set to a value containing some HTML, it will get properly escaped and appear as plain text. If you want to turn this off, write $:name instead of $name.
Now go back to code.py. Under the first line, add:
render = web.template.render('templates/')
This tells web.py to look for templates in your templates directory. Then change index.GET to:
name = 'Bob'    
return render.index(name)
(‘index’ is the name of the template and ‘name’ is the argument passed to it)
Visit your site and it should say hello to Bob.
But let’s say we want to let people enter their own name in. Replace the two lines we added above with:
i = web.input(name=None)
return render.index(i.name)
Visit / and it should say hello to the world. Visit /?name=Joe and it should say hello to Joe.
Of course, having that ? in the URL is kind of ugly. Instead, change your URL line at the top to:
'/(.*)', 'index'
and change the definition of index.GET to:
def GET(self, name):
    return render.index(name)
and delete the line setting name. Now visit /Joe and it should say hello to Joe.
If you wish to learn more about web.py templates, visit the templetor page.

Forms


subscribe to our channel


The form module of web.py allows the ability to generate html forms, get user input, and validate it before processing it or adding it to a database. If you want to learn more about using the module forms web.py, see the Documentation or direct link to Form Library

Databasing

Note: Before you can start using a database, make sure you have the appropriate database library installed. For MySQL databases, use MySQLdb and for Postgres use psycopg2.
First you need to create a database object.
db = web.database(dbn='postgres', user='username', pw='password', db='dbname')
(Adjust these – especially username, password, and dbname – for your setup. MySQL users will also want to change dbn definition to mysql.)
That’s all you need to do – web.py will automatically handle connecting and disconnecting from the database.
Using your database engines admin interface, create a simple table in your database:
CREATE TABLE todo (
  id serial primary key,
  title text,
  created timestamp default now(),
  done boolean default 'f'    );
And an initial row:
INSERT INTO todo (title) VALUES ('Learn web.py');
Return to editing code.py and change index.GET to the following, replacing the entire function:
def GET(self):
    todos = db.select('todo')
    return render.index(todos)
and change back the URL handler to take just / as in:
'/', 'index',
Edit and replace the entire contents of index.html so that it reads:
$def with (todos)
<ul>
$for todo in todos:
    <li id="t$todo.id">$todo.title</li>
</ul>
Visit your site again and you should see your one todo item: “Learn web.py”. Congratulations! You’ve made a full application that reads from the database. Now let’s let it write to the database as well.
At the end of index.html, add:
<form method="post" action="add">
<p><input type="text" name="title" /> <input type="submit" value="Add" /></p>
</form>
And change your URLs list to read:
'/', 'index',
'/add', 'add'
(You’ve got to be very careful about those commas. If you omit them, Python adds the strings together and sees '/index/addadd' instead of your list of URLs!)
Now add another class:
class add:
    def POST(self):
        i = web.input()
        n = db.insert('todo', title=i.title)
        raise web.seeother('/')
(Notice how we’re using POST for this?)
web.input gives you access to any variables the user submitted through a form.
Note: In order to access data from multiple identically-named items, in a list format (e.g.: a series of check-boxes all with the attribute name=”name”) use:
post_data=web.input(name=[])
db.insert inserts values into the database table todo and gives you back the ID of the new row. seeother redirects users to that URL.
Some quick additional notes: db.update works just like db.insert except instead of returning the ID it takes it (or a string WHERE clause) after the table name.
web.input, db.query, and other functions in web.py return “Storage objects”, which are just like dictionaries except you can do d.foo in addition to d['foo']. This really cleans up some code.
You can find the full details on these and all the web.py functions in the documentation.

Developing

web.py also has a few tools to help us with debugging. When running with the built-in webserver, it starts the application in debug mode. In debug mode any changes to code and templates are automatically reloaded and error messages will have more helpful information.
The debug is not enabled when the application is run in a real webserver. If you want to disable the debug mode, you can do so by adding the following line before creating your application/templates.
web.config.debug = False

What Next ?

This ends the tutorial for now. Take a look at the cookbook and the code examples for lots more cool stuff you can do with web.py. Also don’t forget about the api reference

Monday, 9 July 2018

13 Free GIS Software Options: Map the World in Open Source


Your search for free GIS software is now over

You don’t have to pay a king’s ransom to map the world.
This is because you can do it all with free GIS software.
The best part is:
These free GIS software give you the firepower to get the job done as if you’re working with commercial GIS software.
We’ve mapped out the GIS software landscape , but these 13 (out of 30) reign supreme for free mapping software.

1 QGIS – Formerly Quantum GIS

QGIS (Quantum GIS)
After the epic GIS software battle in GIS history between ArcGIS vs QGIS, we illustrated with 27 differences why QGIS is undoubtedly the #1 free GIS software package.
QGIS is jam-packed with hidden gems at your fingertips. For example, you can automate map production, process geospatial data, and generate drool-worthy cartographic figures.
There’s no other free mapping software on this list that lets you map like a rock star than QGIS.
QGIS Plugins boost this mapping software into a state of epicness. If the tool doesn’t exist, search for a plugin developed by the QGIS community.
Volunteer effort is key to its success. The QGIS Stack Exchange support is impressively great.
If you’re still searching for free GIS software, you’d be insane not to download the free GIS software QGIS. Here’s your beginner’s guide to QGIS to get your feet wet.
In February 2018, QGIS 3 brings a whole new set of cartography, 3D and analysis tools. We’ve got you covered on how to find all of its newest features and plugins:

2 gVSIG

gvSIG
In 2004, the gvSIG project emerged as a free, open source GIS software option in Spain.
We illustrate in this gvSIG guide and review why we like it SO much:
gvSIG really outperforms QGIS 2 for 3D. It really is the best 3D visualization available in open source GIS.
The NavTable is agile in that it allows you to see records one-by-one vertically.
The CAD tools are impressive on gvSIG. Thanks to the OpenCAD Tools, you can trace geometries, edit vertices, snap and split lines and polygons.
If you need GIS on your mobile phone, gvSIG Mobile is perfect for field work because of its interface and GPS tools.

3 Whitebox GAT

WhiteBox GAT
Yes, Whitebox GAT (Geospatial Analysis Toolbox) is #3 on the list of open source, free GIS software.
Unbelievably, Whitebox GAT has only been around since 2009 because it feels so fine-tuned when you see it in action.
There’s a hydrology theme around Whitebox GAT. It actually replaced Terrain Analysis System (TAS) – a tool for hydro-geomorphic applications.
Whitebox GAT is really a full-blown open-access GIS and remote sensing software package.
Where it shines is LIDAR!
With no barriers, Whitebox GAT is the swiss-army knife of LiDAR data.
The LiDAR toolbox is a life-saver. For example, LAS to shapefile is an insanely useful tool. But you may need a Java update to go in full throttle though.
The cartographic mapping software tools are primitive compared to QGIS.
But overall Whitebox GAT is solid with over 410 tools to clip, convert, analyze, manage, buffer and extract geospatial information.
I find it amazing this free GIS software almost goes unheard of in the GIS industry.
Get more useful knowledge from the Whitebox GAT Open Source Blog.

4 SAGA GIS

SAGA GIS
SAGA GIS (System for Automated Geoscientific Analyses) is one of the classics in the world of free GIS software.
It started out primarily for terrain analysis such as hillshading, watershed extraction and visibility analysis.
Now, SAGA GIS is a powerhouse because it delivers a fast growing set of geoscientific methods to the geoscientific community.
Enable multiple windows to lay out all your analysis (map, histograms, scatter plots, attributes, etc). It provides both a user-friendly GUI and API.
It’s not particularly useful in cartography but it’s a lifesaver in terrain analysis.
Closing gaps in raster data sets is easy. The morphometry tools are unique including the SAGA topographic wetness index and topographic position classification. If you have a DEM, and don’t know what to do with it – you NEED to look at SAGA GIS.
Overall, it’s quick, reliable and accurate. Consider SAGA GIS a prime choice for environmental modeling and other applications.

5 GRASS GIS

GRASS GIS Desktop
GRASS GIS (Geographic Resources Analysis Support System) was developed by the US Army Corps of Engineers as a tool for land management and environmental planning.
It has evolved into a free GIS software option for different areas of study.
Academia, environment consultants and government agencies (NASA, NOAA, USDA and USGS) use GRASS GIS because of its intuitive GUI and its reliability.
It has over 350 rock-solid vector and raster manipulation tools.
Not awfully useful in cartographic design, GRASS GIS excels primarily as a free GIS software option for analysis, image processing, digital terrain manipulation and statistics.

6 MapWindow

map window 5
In 2000, MapWindow was proprietary GIS software. However, it has been made open through a contract with the US EPA called “Basins”. At this point, The source code was released to the public.
Now that MapWindow 5 has been released, it surprisingly has some serious punch. For example, MapWindow does about 90% of what GIS users need – map viewer, identify features, processing tools and print layout.
It has some higher level tools such as TauDEM for automatic watershed delineation. While HydroDesktop for data discovery, download, visualization and editing, DotSpatial for GIS programmers. In addition, it has an extensible plugin architecture for customization.

7 ILWIS

ilwis software
Free GIS software users rejoice. Once commercial GIS software, now turned into open source GIS. ILWIS (Integrated Land and Water Information Management) is an oldie but a goodie.
The extinction-proof ILWIS is free GIS software for planners, biologists, water managers and geospatial users. ILWIS is good at the basics – digitizing, editing, displaying geographic data. Further to this, it’s also used for remote sensing with tools for image classification, enhancements and spectral band manipulation.
Over time, it has improved support for time series, 3 analysis and animation. Overall, I found it difficult to do some of the basics like adding layers. However, the documentation is thorough with a pretty decent following for usage.

8 GeoDa


GeoDa Software
GeoDa Software

GeoDa is a free GIS software program primarily used to introduce new users into spatial data analysis. It’s main functionality is data exploration in statistics.
One of the nicest things about it is how it comes with sample data for you to give a test-drive. From simple box-plots all the way to regression statistics, GeoDa has complete arsenal of statistics to do nearly anything spatially.
It’s user base is strong. For example, Harvard, MIT and Cornell universities have embraced this free GIS software to serve as a gentle introduction to spatial analysis for non-GIS users. From economic development to health and real estate, it’s been used as an exciting analytical in labs as well.

9 uDig

uDig
uDIG is an acronym to help get a better understanding what this Free GIS software is all about.
  • u stands for user-friendly interface
  • D stands for desktop (Windows, Mac or Linux). You can run uDIG on a Mac.
  • I stand for internet oriented consuming standard (WMS, WFS or WPS)
  • G stands for GIS-ready for complex analytical capabilities.
When you start digging into uDig, it’s a nice open source GIS software option for basic mapping.uDig’s Mapnik lets you import basemaps with the same tune as ArcGIS
Specifically, it’s easy-to-use, the catalog, symbology and Mac OS functionality are some of the strong points. But it has limited tools and the bugs bog it down to really utilize it as a truly complete free GIS software package.

10 OpenJump

OpenJUMP GIS
Formerly JUMP GIS, OpenJump GIS (JAVA Unified Mapping Platform) started as a first class conflation project. It succeeded. But eventually grew into something much bigger. Because of how its large community effort grew, OpenJUMP into a more complete free GIS software package.
One of its strengths is how it handles large data sets well. Rendering is above-grade with a whole slew of mapping options. For example, you can generate pie charts, plotting and choropleth maps.
OpenJUMP GIS Plugins enhance its capabilities. There are plugins for editing, raster, printing, web-processing, spatial analysis, GPS and databases. Conflating data is another option with a whole lot more from its plugins.

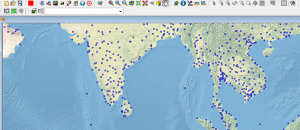
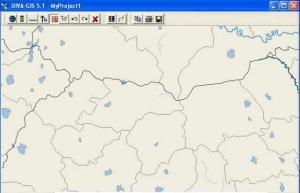
11 Diva GIS

Diva GIS Free Software
Biologists using GIS unite! This one specializes in mapping biological richness and diversity distribution including DNA data.
Diva GIS is another free GIS software package for mapping and analyzing data. Diva GIS also delivers useful, every day free GIS data for your mapping needs.
It’s possible to extract climate data for all locations on the land. From here, there are statistical analysis and modeling techniques to work with.
For the biologist in you, it’s worth a long look for biologists around the world. Otherwise, you should be looking at one of the top options above.

12 FalconView

FalconView GIS Software
The initial purpose of FalconView is to be a free and open source GIS software.
Georgia Tech built this open software for displaying various types of maps and geographically referenced overlays.
Now, most of FalconView’s users are from the US Department of Defense and other National Geospatial Intelligence Agencies. This is because it can be used for combat flight planning.
In SkyView mode, you can fly-through even using MXD files. It supports various types of display like elevation, satellite, LiDAR, KMZ and MrSID.

13 OrbisGIS

Orbis GIS
OrbisGIS is a work-in-progress. Its goal is to be a cross-platform open source GIS software package designed by and for research.
It provides some GIS techniques to manage and share spatial data. OrbisGIS is able to process vector and raster data models.
It can execute processes like noise maps or hydrology process without any add-ons. Orbis GIS Plug-ins are available but are very limited for the time-being.
The developers are still working on the documentation. You may want to look elsewhere until this project gets sturdy up on its feet.

Free GIS Software List

As we have shown, there’s a bucket load of free GIS software that can:
  • Perform hundreds of advanced GIS processing tasks.
  • Generate stunning cartography and mapping products.
  • Manage your company’s geospatial assets efficiently.
Now that you have a better vision of free GIS software available to you, did we miss anything?
Let us know with a comment below.

Rank

seo