
We will use the geo-database configured in the previous tutorial, fill one of its table with world cities geocoordinates, and show these cities eventually on a map in the Django web app that will be configured in this tutorial.
Create a new Django project
Another python package that must be installed is the PostgreSQL adapter for python, Psycopg:
For the purpose of this tutorial, we’ll go briefly through the steps necessary to create a new Django project with a single app. A more comprehensive tutorial dedicated to creating a poll application with Django can be found on the official website, and constitutes a good starting point to get started with Django.
Create a new directory and generate a new project inside of it. Let’s call our project “world”:
Afterwards, we need to configure Django to have access to the database we created using the user added in the first part of this tutorial. To do so, in your project folder open the file ‘world/settings.py` and add the following (don’t forget to set the database name and the user/password accordingly):
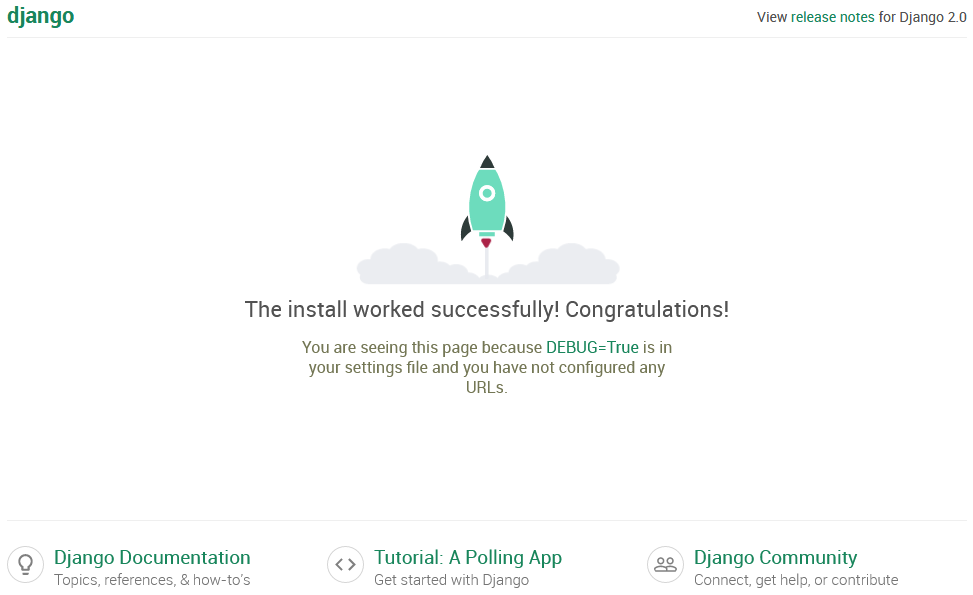
If the database has been configured correctly, you can now run the server from the command-line:
And you should see a webpage similar to the one below if you go to “localhost:8000” in your browser:

Create a new Django app
GeoDjango is a module included with Django that adds support to Geospatial data. One important feature of the GeoDjango module we will need in this tutorial are geospatial fields in Django models. However, GeoDjango needs to be enabled first in our project by adding it to the list of installed apps in “world/settings.py”:
Next, we create a single app in our project. We’ve called this app “cities” since it will represent the list of cities we will copy from the vector file to the database later:
And add this app the list of apps in “world/settings.py”, as we did for GeoDjango:
In this app, we create a model which represents an abstraction of the database table, by adding the code below to “cities/models.py”. This model has two fields representing the name and the coordinates of the cities respectively. The meta class modifies the formatting in the Django admin backend by telling it to sort the cities by name and to set the plural of the word ‘city’ to “cities” (not “citys” as we would get by default):
From this model a database table can generated with the commands below. Note that the second command will also create Django’s admin module tables that will store the users credentials among others:
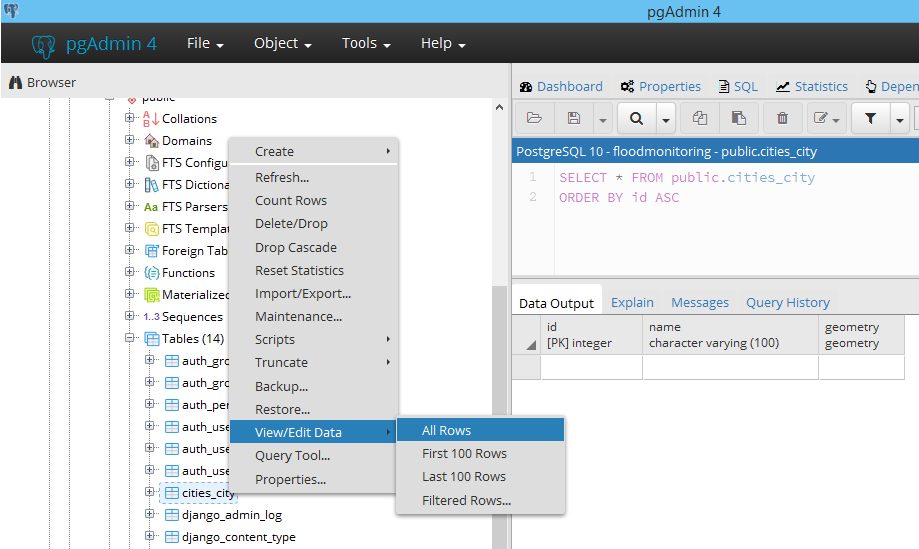
We can verify the creation of the database table with PgAdmin4.

Convert shapefile to PostGIS table
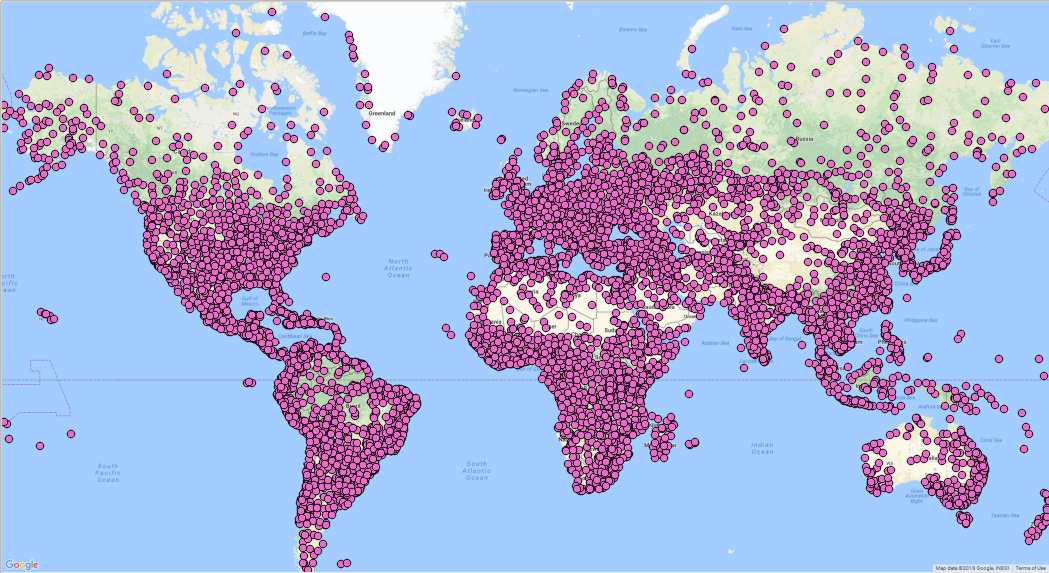
The vector shapefile of interest in this tutorial is a map of the world cities that can be also downloaded from this link. This shapefile can be opened and visualized with QGIS. This is what it should look like if it is superimposed on Google maps (over 7000 cities all over the world):

We will need to initially convert this vector shapefile to the PostGIS format of our database table (i.e. basically fill the table with the shapefile content), so we can access it later from the Django’s admin section (localhost:8000/admin) and from the front-end (localhost:8000/cities).
We must install the GDAL commands which if on Windows are included with QGIS. After installing QGIS the commands we will need can be found in the OSGeo4W Shell, which was installed with QGIS as well. On Arch Linux, this can be done differently by installing GDAL from the terminal:
On Windows, to avoid having a GDALException later regarding a missing EPSG csv file, we’re going to be proactive and add a system environment variable called “GDAL_DATA” having as a value: “C:\Program Files\QGIS 2.18\share\gdal”.
The conversion from the .shp format to the PostGIS table is carried out with a single command. Don’t forget to provide the database name, the database user and password, as well as the database table name that can be retrieved using the PostgreSQL GUI client, pgAdmin4. The -append option ensures that we’re adding to the existing table generated from the previous Django model, instead of creating the database table from scratch:
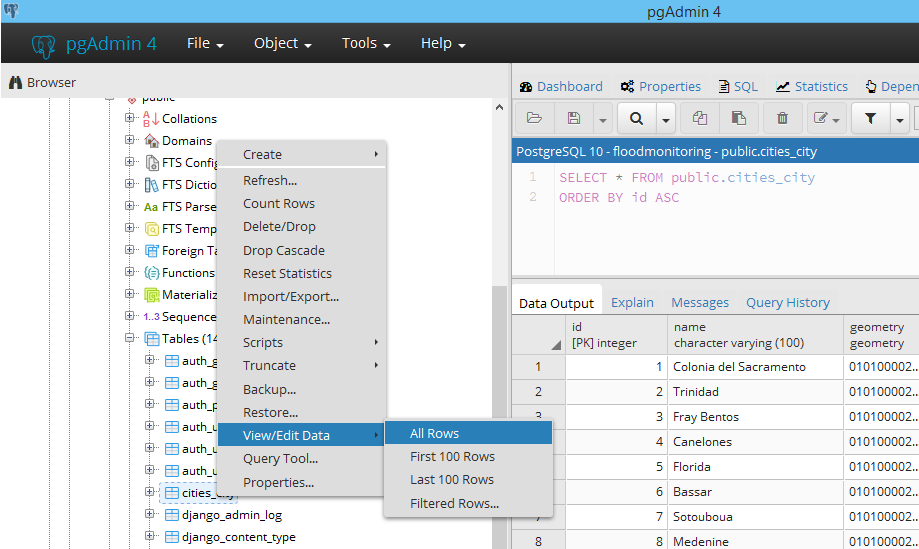
We can verify that the database table has been correctly filled with the cities names and geocoordinates in PgAdmin4:

Configure URL routes
Url routes have to be set-up so that the cities app can be accessed from the browser. We thus open “world/urls”, and add the url to the new app in the urlpatterns list:
All it does is to redirect any url that starts with “cities” to the urls file in the cities app. So what we have left to do is to create this file “cities/urls.py”:
Show cities on a map
In the following we’ll display on the browser the cities that we copied inside the database table. Django-leaflet is based on leaflet and is installed the same way as any python module. We’re going to make use of Django-leaflet to display maps on our Django web app:
This app needs to be registered among the list of installed apps in “world/settings.py”:
The url route added in the last part of the previous section forwards any request under the form “cities/<number>” to the CitiesDetailView class. This class is added to “cities/views.py”:
The generic class we’re inheriting from (django.views.generic.DetailView) already implements the detail view for a single city. We therefore just need to provide the template path and the model to render. The template for this detail page will be located in “templates/cities/city-detail.html”. Its content can be found below, where we followed the examples on Django-leaflet docs. The only part that deserves a small explanation is in the javascript block, where we’re putting a marker with leaflet at the coordinates of the city in question:
Now that both the view, the url route and the template have been configured if you browse to http://localhost:8000/cities/city/7223 for example, you should see a map of the city of San Francesco:


This tutorial has been relatively long. The next one in the series, which is actually the last one, will cover how to display maps on the Django admin page using Leaflet as always.
GEOS error on Windows
On Windows, when I browse to the url just created (e.g. localhost:8000/cities/city/1), Django started complaining about the GEOS library which couldn’t be found. To fix it, just open the settings.py and add at the end the path to this library (libgeos_c.dll), which is located inside the PostgreSQL folder:
Don’t forget to clap if this story has been useful to you.
No comments:
Post a Comment
Thanks for your comments